TeslaUSB - A Fully Automated Dashcam Storage Device (Part 2)

TLDR; I reconfigured the TeslaUSB we set up in the first blog and added the feature to sync music from a network share and also added the ability to get notifications when the dashcam archiving completes. It seems to be working perfectly! Hooray!
The long version:
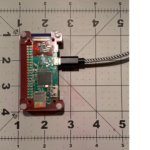
Hopefully, you read our previous blog about setting up the TeslaUSB. In it we describe the process of doing an installation of the software on a Raspberry Pi Zero W and configuring it for the most basic function of recording and archiving saved dashcam clips. Now we’re going to extend that configuration to include a couple more cool features and see if we can get them to work. You know what software engineers say, if it still works, it doesn’t have enough features.
Adding bells and whistles:
I decided I wanted to add the feature to sync music from a CIFS mounted file share as well as the feature to send me a notification when dashcam files have completed uploading (archiving) to my network drive. Adding the music feature requires repartitioning the drive (microSD card) so this really means starting over since we can’t repartition without destroying the data that is already there, but (as shown in the previous blog entry) it’s a pretty simple process and doesn’t take long.
Push Notifications:
To add push notifications, you need an application running on your smart phone to receive them. There are a couple of options to choose from here and I’m going to try Pushover. So, I’m going to first create a new account at pushover.net.
Having created the account and verified my email address, I’ve been given a ‘User Key’. According to the instructions on github, I need an API key and this is obtained by going to ‘Your Applications‘ on the Pushover dashboard and clicking on ‘Create an Application/API Token‘. It doesn’t really matter what I call my application as it only needs to be unique to my Pushover account, so I’m going with ‘teslausb’. Original, right? That gets me an ‘API Token/Key’ which I’ll plug into the configuration later along with the ‘User Key’.
Support for Music Files:
Now that I have notifications set up, I’m going to create a folder on my network drive to contain the music files I want to sync to the drive on the RPi. I’ll just create a folder named ‘Music’ in the share named ‘jerry’. In theory, the way this should work is this. I copy files into the ‘jerry/Music’ folder on my network drive, the TeslaUSB finds them and copies them to the music partition on the RPi (maybe not until after my next drive, while it’s archiving the dashcam footage?). Later, I delete some files from the ‘jerry/Music’ folder and the next time the TeslaUSB syncs, it deletes those files from the music partition.
In order to test this, I loaded some music files into the ‘jerry/Music’ folder on my WDMyCloudMirror network-attached storage device. I didn’t bother with folders to define the artists or albums, etc. because the Tesla audio system software works all this out for itself. It will determine the correct artist, album and genre for each music file and classify them as such when you access the USB as an audio source. Plus, it’s not clear to me whether TeslaUSB looks for folders in the music share when it syncs.
NOTE: Music files must be free of DRM (Digital Rights Management) in order to play on this device.. If you have purchased music from iTunes and its file extension .M4A, for instance it will not play. I’m guessing it might play .WMV files but, in all likelihood, what you want to use are .MP3 files.
The Final Configuration:
Okay, now that I have all the external stuff done it’s time to grab the microSD card out of the Raspberry Pi, mount it on my laptop and reflash the original teslausb image to it. (See first blog entry if you need a how-to reminder.)
Once the image has been refreshed on the microSD card, we can remount it and edit the config file (teslausb_setup_variables.conf). Recall that this file won’t exist now that we have flashed the card back to its default state. So we can, again rename teslausb_setup_variables.conf.sample to teslausb_setup_variables.conf and edit that file using whatever plain text editor you wish to make our changes. Here’s the relevant lines from my new config (without all the comments).
export ARCHIVE_SYSTEM=cifs
export archiveserver=WDMyCloudMirror
export sharename=jerry
export shareuser=************@gmail.com
export sharepassword=***********
.
.
.
export camsize=50%
.
.
.
export musicsharename='jerry/Music'
.
.
.
export SSID='Skynet'
export WIFIPASS='********'
.
.
.
export HEADLESS_SETUP=true
.
.
.
export timezone="America/Los_Angeles"
.
.
.
export pushover_enabled=true
export pushover_user_key=***************************
export pushover_app_key=***************************
.
.
.
export tesla_email=********@gmail.com
export tesla_password=********
.
.
.
export tesla_vin=5YJ3E1EB8KF******
After saving the configuration and properly ejecting the microSD card from my laptop I put it in the Raspberry Pi and plugged that into my laptop being sure to use the USB port on the RPi. I verified that the setup was successful by logging on and checking for the TESLAUSB_SETUP_FINISHED file in the /boot directory. ( for full instructions, refer the the previous blog entry ).
NOTE: Because we defined a music partition on the microSD card, the RPi will now show up as two drives on your computer – one named CAM and another named MUSIC. Make sure you eject them BOTH before unplugging the RPi from your computer.
I plugged the RPi into my Tesla and waited for the camera icon to appear (takes about 90 seconds). When it appears, the dot is gray. That’s because I pressed on the icon to pause recording before I removed it and when I put it back in, the Tesla remembers that it’s paused. I tapped the icon and the dot turned red, indicating the dashcam is enabled.
The Test:
After a short drive, during which I made a few stops and collected some ‘Sentry alerts’ and manually saved a clip from the camera, I headed back to the barn. A few minutes after arriving home, I got a message from Pushover on my Apple watch stating,
Archiving 4 event folders with 96 file(s) starting at Fri 9 Jan 16:04:34 PST 2020
A couple hours later, I received another message stating:
Moved 94 dashcam file(s), failed to copy 0, deleted 0
I’m not sure what the ‘deleted 0’ is about. I checked my network drive and all the files appear there. I paused the dashcam, removed the RPi from my Tesla and plugged it into my laptop. The CAM volume doesn’t contain any files, so clearly it did delete all the files it archived. While I had it plugged in, I also checked the MUSIC folder and found that my MP3 files had indeed been copied in from the ‘jerry/Music’ share.
I ejected the CAM and MUSIC drives from my laptop, removed the RPI and put it back in the Tesla. When it finished booting, I tapped on the music icon on the Tesla touchscreen, selected the USB icon and Voila! There were my music files. I tapped one, then another and they played instantly. I was concerned there might be some lag in music starting because the RPi is a smart device and not just a ‘dumb’ storage device but even switching from one track to another, it’s instantaneous.
So, SUCCESS again! It looks like this TeslaUSB really is all it’s cracked up to be. There’s still at least one more feature to explore – setting it up as a WiFi hotspot so you can view footage while you’re out and about. We’ll try that in a future blog.


